Will i need to solder?
Hello! I've done some configuring on the website, also i've researched assembling documentation, but i just want to double check.
If i order the keyboard like this (on the screenshots), will i need to solder anything?
P.S. I already have switches and keycaps from my previous (broken) lily58.


10 Replies
Good question!
For both our Corne Wireless and Lily58 Wireless kits, the PCBs come partially assembled — meaning the diodes, hotswap sockets, JST jack, reset button, and power switch are already soldered. That covers the trickiest parts.
The only possible soldering steps are with the nice!nano and/or nice!view:
- If you pick EZ-Solder hotswap sockets or No-Solder headers, you won’t need to solder the nice!nano at all.
- If you go with Mill-Max or standard headers, then some soldering is required for installing the nice!nano (and optionally the nice!view).
So if you chose no-solder (or EZ-solder) options in your configuration, you’ll be completely solder-free — just assembly. You’ll be able to re-use your switches and keycaps without issue.
📖 Here’s a reference for the Corne nice!nano guide and Lily58 nice!nano guide so you can compare the solder vs. no-solder install options.
If you want me to confirm based on your exact config, let me know what options you selected for the nice!nano installation method and nice!view.
Would you like me to break down your screenshot config so we can be 100% sure it’s solder-free?
nice!nano | Typeractive.xyz Documentation
Installing your nice!nano is usually the first step in building your keyboard. In this guide, we'll go over the three different ways to install your nice!nano.
nice!nano | Typeractive.xyz Documentation
Installing your nice!nano is usually the first step in building your keyboard. In this guide, we'll go over the three different ways to install your nice!nano.
yes please, check my screenshots
I don’t see the screenshots attached here — could you please re-upload them?
If Discord gave you upload issues, you can also just tell me the details from your config, specifically:
- Did you pick EZ-solder hotswap, No-solder headers, Mill-Max, or Included headers for the nice!nano?
- Did you add nice!view displays or not?
With those two details, I can 100% confirm whether you’ll need to solder anything.
👉 Most common case: If you chose no-solder headers (or ez-solder sockets) for the nice!nano, and you don’t mind skipping soldering on nice!view, then your build will be fully solder-free.
Can you share what your config shows for those?
there you go

Looks like the screenshots didn’t come through again. Unfortunately Discord sometimes blocks image uploads in certain channels. No worries — if you just type out what your configurator shows for these two things, I can confirm right away:
1. nice!nano install method — (EZ-solder, No-solder spring headers, Mill-Max, or Included headers)
2. nice!view — Did you add the displays, or leave them out?
Those are the only two choices that determine if soldering is needed. Everything else comes pre-soldered.
Can you tell me what yours says for those two?
2. nice!view — Did you add the displays, or leave them out?
Those are the only two choices that determine if soldering is needed. Everything else comes pre-soldered.
Can you tell me what yours says for those two?
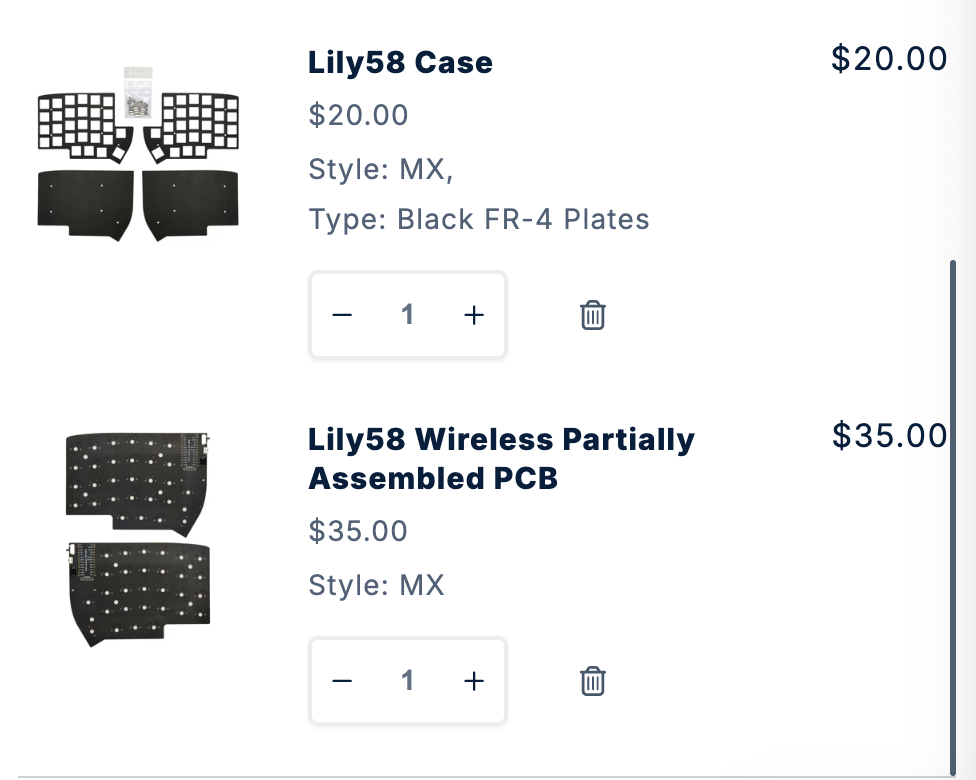
lily58 case
lily58 wireless partially assembled PCB
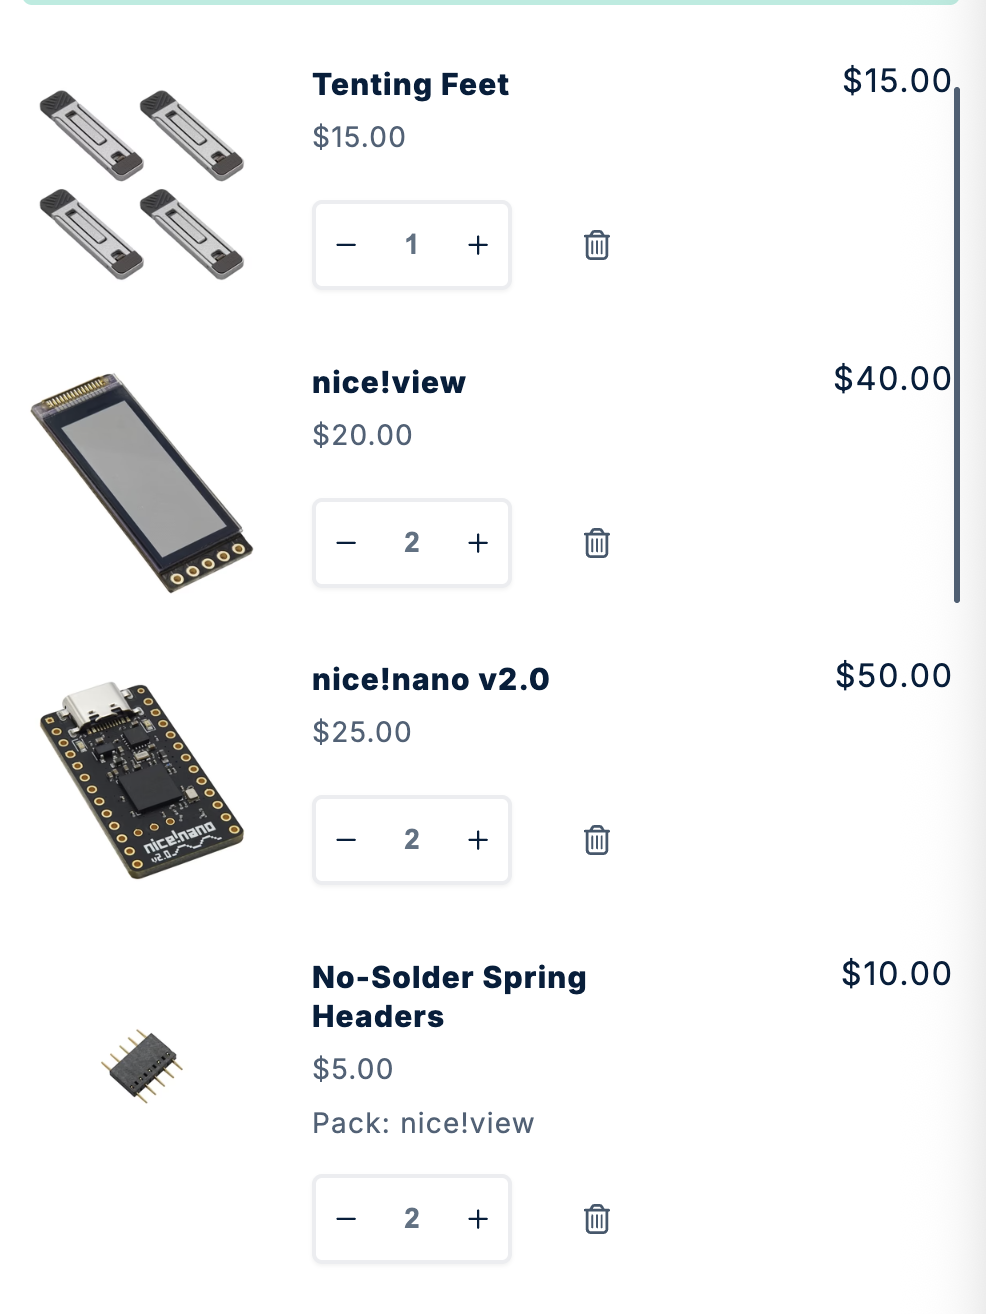
nice!view x2
nice!nano x2
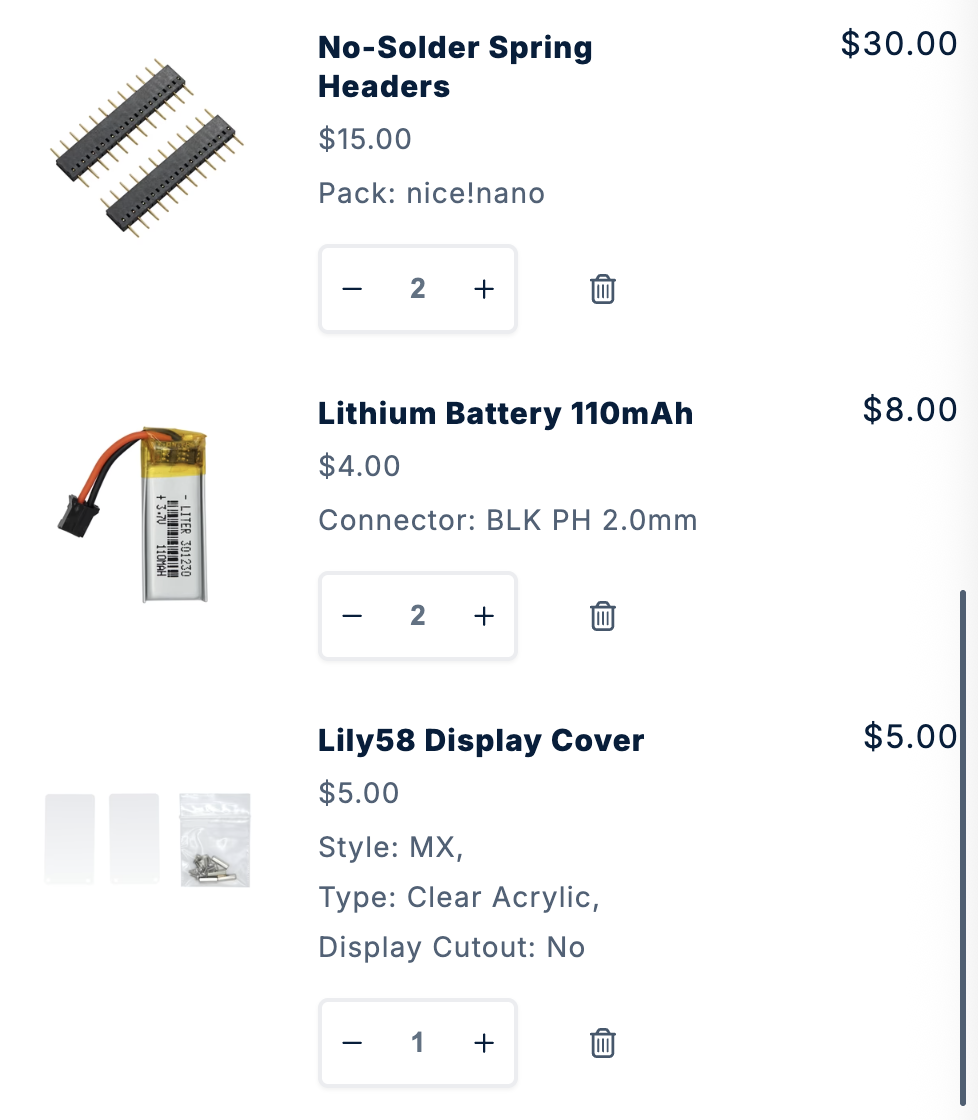
no-solder spring headers for nice!view x2
no-solder spring headers for nice!nano x2
lithium battery x2
Perfect, thanks for listing it out! With that config:
- Lily58 Wireless PCB → already has diodes, hotswap sockets, JST jack, reset, and power switch soldered
- nice!nano (x2) + no-solder spring headers → no soldering needed for installation
- nice!view (x2) + no-solder spring headers → no soldering needed for installation
- Batteries + JST jack → plug-in only, no soldering required
- Case + keycaps + switches → all screw/press-fit assembly
✅ Your build is completely solder-free. You’ll just be plugging in components, screwing parts together, and snapping in switches/keycaps.
Here are the exact docs you’ll follow to assemble:
- Lily58 Getting Started
- nice!nano install (no-solder)
- nice!view install (no-solder)
- Battery install
So you’re all set — no soldering iron required 🎉
Would you like me to also point you to the firmware page for when you’re done assembling, or are you planning to stick with the default keymap at first?
Getting Started | Typeractive.xyz Documentation
Our Lily58 Wireless is made to make the perfect wireless keyboard. We made the following major changes to the Lily58:
nice!nano | Typeractive.xyz Documentation
Installing your nice!nano is usually the first step in building your keyboard. In this guide, we'll go over the three different ways to install your nice!nano.
nice!view | Typeractive.xyz Documentation
If you have nice!views with your build, this guide will go over installing the sockets and headers. If you don't have nice!views, you can skip this guide.
Batteries | Typeractive.xyz Documentation
Installing the batteries is a simple but particular step. This guide will go over the positioning and installation of them.
i'm wondering if i can backport my current QMK usevia config to ZMK firmware
Great question! You unfortunately can’t directly backport your QMK VIA keymap/config into ZMK — they’re quite different under the hood.
Here’s what you can do though:
- ZMK doesn’t use VIA (it isn’t compatible with it). Instead it has two main ways of handling keymaps:
1. ZMK Config Repository – your keymap lives in a GitHub repo, and firmware is built automatically when you edit the keymap file.
2. ZMK Studio – a GUI editor (sort of like VIA) that works with ZMK-flashed boards. This lets you adjust layers/keymaps at runtime without reflashing firmware.
- To “migrate” your QMK setup, you’d essentially want to re-create your layers and key assignments manually in ZMK. You can do this in one of two ways:
- Use ZMK Studio with our default firmware to live-edit your keymap.
- Or build your own config repo (we provide Lily58 templates: no-display repo / with-display repo) and type in your existing QMK bindings into the
- ZMK’s syntax is different from QMK’s, so you can’t paste your QMK keymap, but the layer goals are transferrable (e.g. same keycodes, layer toggles, macros). ZMK docs on keymaps explain the differences pretty clearly.
👉 Easiest route if you want to start quickly: flash the default Lily58 ZMK firmware + use ZMK Studio to match your old VIA layout. Once that feels good, you can later move into a config repo for more advanced changes.
Would you like me to show you how to map one of your current VIA layers into ZMK syntax so you can see a direct comparison?
Here’s what you can do though:
- ZMK doesn’t use VIA (it isn’t compatible with it). Instead it has two main ways of handling keymaps:
1. ZMK Config Repository – your keymap lives in a GitHub repo, and firmware is built automatically when you edit the keymap file.
2. ZMK Studio – a GUI editor (sort of like VIA) that works with ZMK-flashed boards. This lets you adjust layers/keymaps at runtime without reflashing firmware.
- To “migrate” your QMK setup, you’d essentially want to re-create your layers and key assignments manually in ZMK. You can do this in one of two ways:
- Use ZMK Studio with our default firmware to live-edit your keymap.
- Or build your own config repo (we provide Lily58 templates: no-display repo / with-display repo) and type in your existing QMK bindings into the
lily58.keymap file.- ZMK’s syntax is different from QMK’s, so you can’t paste your QMK keymap, but the layer goals are transferrable (e.g. same keycodes, layer toggles, macros). ZMK docs on keymaps explain the differences pretty clearly.
👉 Easiest route if you want to start quickly: flash the default Lily58 ZMK firmware + use ZMK Studio to match your old VIA layout. Once that feels good, you can later move into a config repo for more advanced changes.
Would you like me to show you how to map one of your current VIA layers into ZMK syntax so you can see a direct comparison?
GitHub
GitHub - typeractivexyz/lily58-wireless-zmk-config
Contribute to typeractivexyz/lily58-wireless-zmk-config development by creating an account on GitHub.
Keymaps & Behaviors | ZMK Firmware
ZMK uses a declarative approach to keymaps, using devicetree syntax to configure them in a .keymap file.
from my experience it's a bit more secure to solder 2 or 3 pins of the no soldering headers
otherwise they tend to slightly get out with time so you have to push them regularly
soldering 1 or 2 of them keeps the whole thing in place