Mask not covering original element when put on a webpage?
Just wondering if anyone had any ideas. I'm masking a bg element with a picture to make an outline shape, and then placing that shape back on top of the picture so I can reveal it with a clip-path animation.
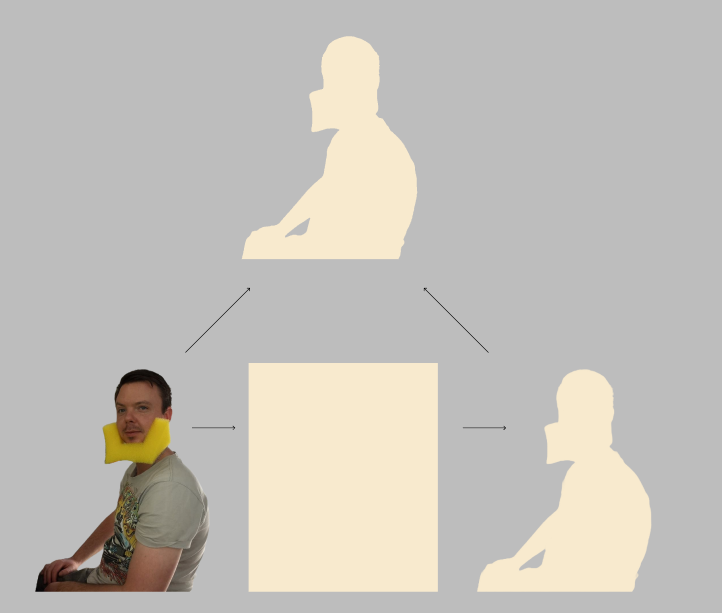
Problem is it looks fine in figma, but on the page you can clearly see the image bleeding through at the edges. Just not really sure how to deal with this (as it doesn't seem as simple as scaling up the mask element). Both elements are identical sizes according to the dom.
Nick


18 Replies
it's likely a subpixel issue, something to do with blending and how the browser renders elements. It happens with rounded borders as well. The only real solution is to shrink the lower layer or enlarge the upper
I'd recommend taking the selection you used to create the mask and growing it by one or two pixels before applying it to the mask
Hi Jochem - yeah that's what I originally tried, but scaling doesn't work as I thought it would.
I've scaled it up by 10px at the same aspect ratio to make it more obvious, but there's no way to move the larger silhouette to cover the original:

moving that to the left just reveals elsewhere 🙂
i've tried scaling from the center with no luck either
you'd have to get the positioning right. In this isolated example, I'd grow the selection by 2px for the mask, then add a 2px padding to the other image in CSS so it's the same size
nice, i'll give that a try
it's dependent on the exact dimensions and aspect ratio and padding on the specific images how you'd get it perfect though
if it's +2px on the width am i just adding 2px padding horizontally and not worrying about the height?
how are you adding the 2px?
just +2px in figma to the width with a locked aspect ratio
or you think i should just do in the css?
ideally, you'd remake the mask from the base image, then use the grow-selection tool in your image editor to get it to be a bit bigger, and save both layers as images with the same x and y size
as for adding the padding if you just scaled the mask in figma, you'd want 2px all around probably
I'll have a play around, thanks!
here's an image to illustrate what I mean, with the mask transparent so you can see what's going on, and exaggerated in size:

I magic-wand-selected the person in Gimp, grew the selection, then cropped to selection size. Added a new layer, bucked-filled the selection with the mask color. Now you can export both layers, and they'll have the same size so they'll overlap perfectly. The lower layer just has some padding built-in
awesome. but unfortunately i think that's beyond my editing skills, even though I know it must be pretty basic 😆
i think i've come across a solution though - just make the silhouette a jpg with the same bg color?
ah, so "grow" the mask but not in the same color
so if i clip-path reveal the image on the right it does the background color too, but you'll never see that because it's the same as the page color. the image behind can't bleed through at the edges because it's fully covered

bit of a pain if there's ever a gradient on the page, but luckily there isn't
i think that'll work?
*yup, perfect.
thanks a lot for your help. will definitely go that route if i ever want to change up the background
Can you hide the silhouette until the top image moves off if it ?