Absolutely they don't, and that's why I bumped the roll forces up by some factor long ago (long ago - that's why I don't remember the precise value). OTOH, the toolset that we have is a bit limited. But finally, I think it also requires a shift in expectaions and understanding of how the devices work. For example, with driving wheels, it's much easier, because most of use drive cars. I know that sport cars have different feeling and you can't compare sport cars with everyday cars directly, but at least we (racing sim users with no real life racing experience) have some sort of experience to which we can refer. With flying, we come from being conditioned by decades of using spring-centred sticks, and it's sometimes very distracting and if feels awkward when a stick is almost numb - I mean no reaction. For example, we like a nice centre detent because it makes us feel reassured that we have no deflection etc, while in real life 'no deflection' is a bit more abstract, because everything is much less precise - for example the aircraft is a bit crooked and requires some constant aileron input.
 C
C N
N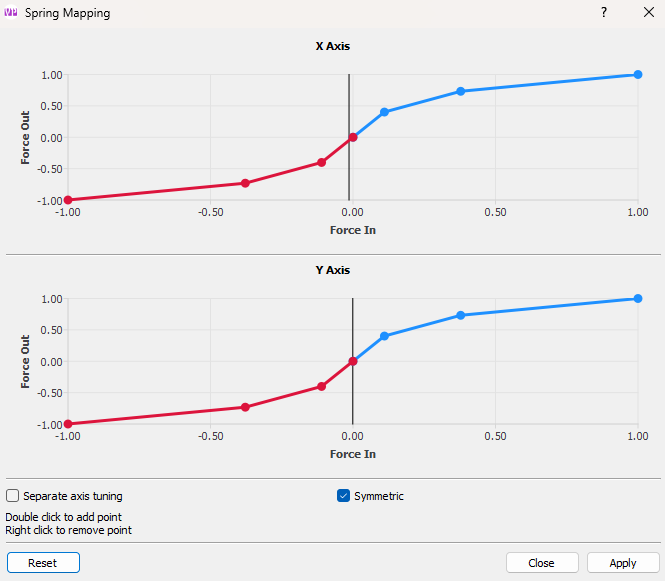
 G
G
 R
R B
B H
H W
W V
V RHINO #0556 Has Shipped!
 RHINO #0557 Has Shipped!
 B
B
 G
G
 A
A
 B
B