Between 5 and 10hours is a great estimate on the amount of work. Depends on how confident you are w
Between 5 and 10hours is a great estimate on the amount of work.
Depends on how confident you are with medium scale projects and/or the quality of prints also makes a slightly difference.
If you’re comfortable with a soldering station and have that preset up and you’ve got some random bits of wire or heat shrink you’ll be just fine.
Follow the guide.
Follow the guide.
Follow. The. Guide.
PAY CAREFUL ATTENTION TO PART ORIENTATION.
As example the main stick mount has a slot for the wires. Pay attention to “where it’s at” and “how it’s facing” in the pics and as you move along keep it as a reference point.
If you have ANY issue… back up and start again. Some parts can go on both ways but the screws only fit, or are only recessed, one way.
Remember wire length matters! Short and sweet plus a little slack..
When connecting the motors pay attention to the Labels. They should be facing UP!
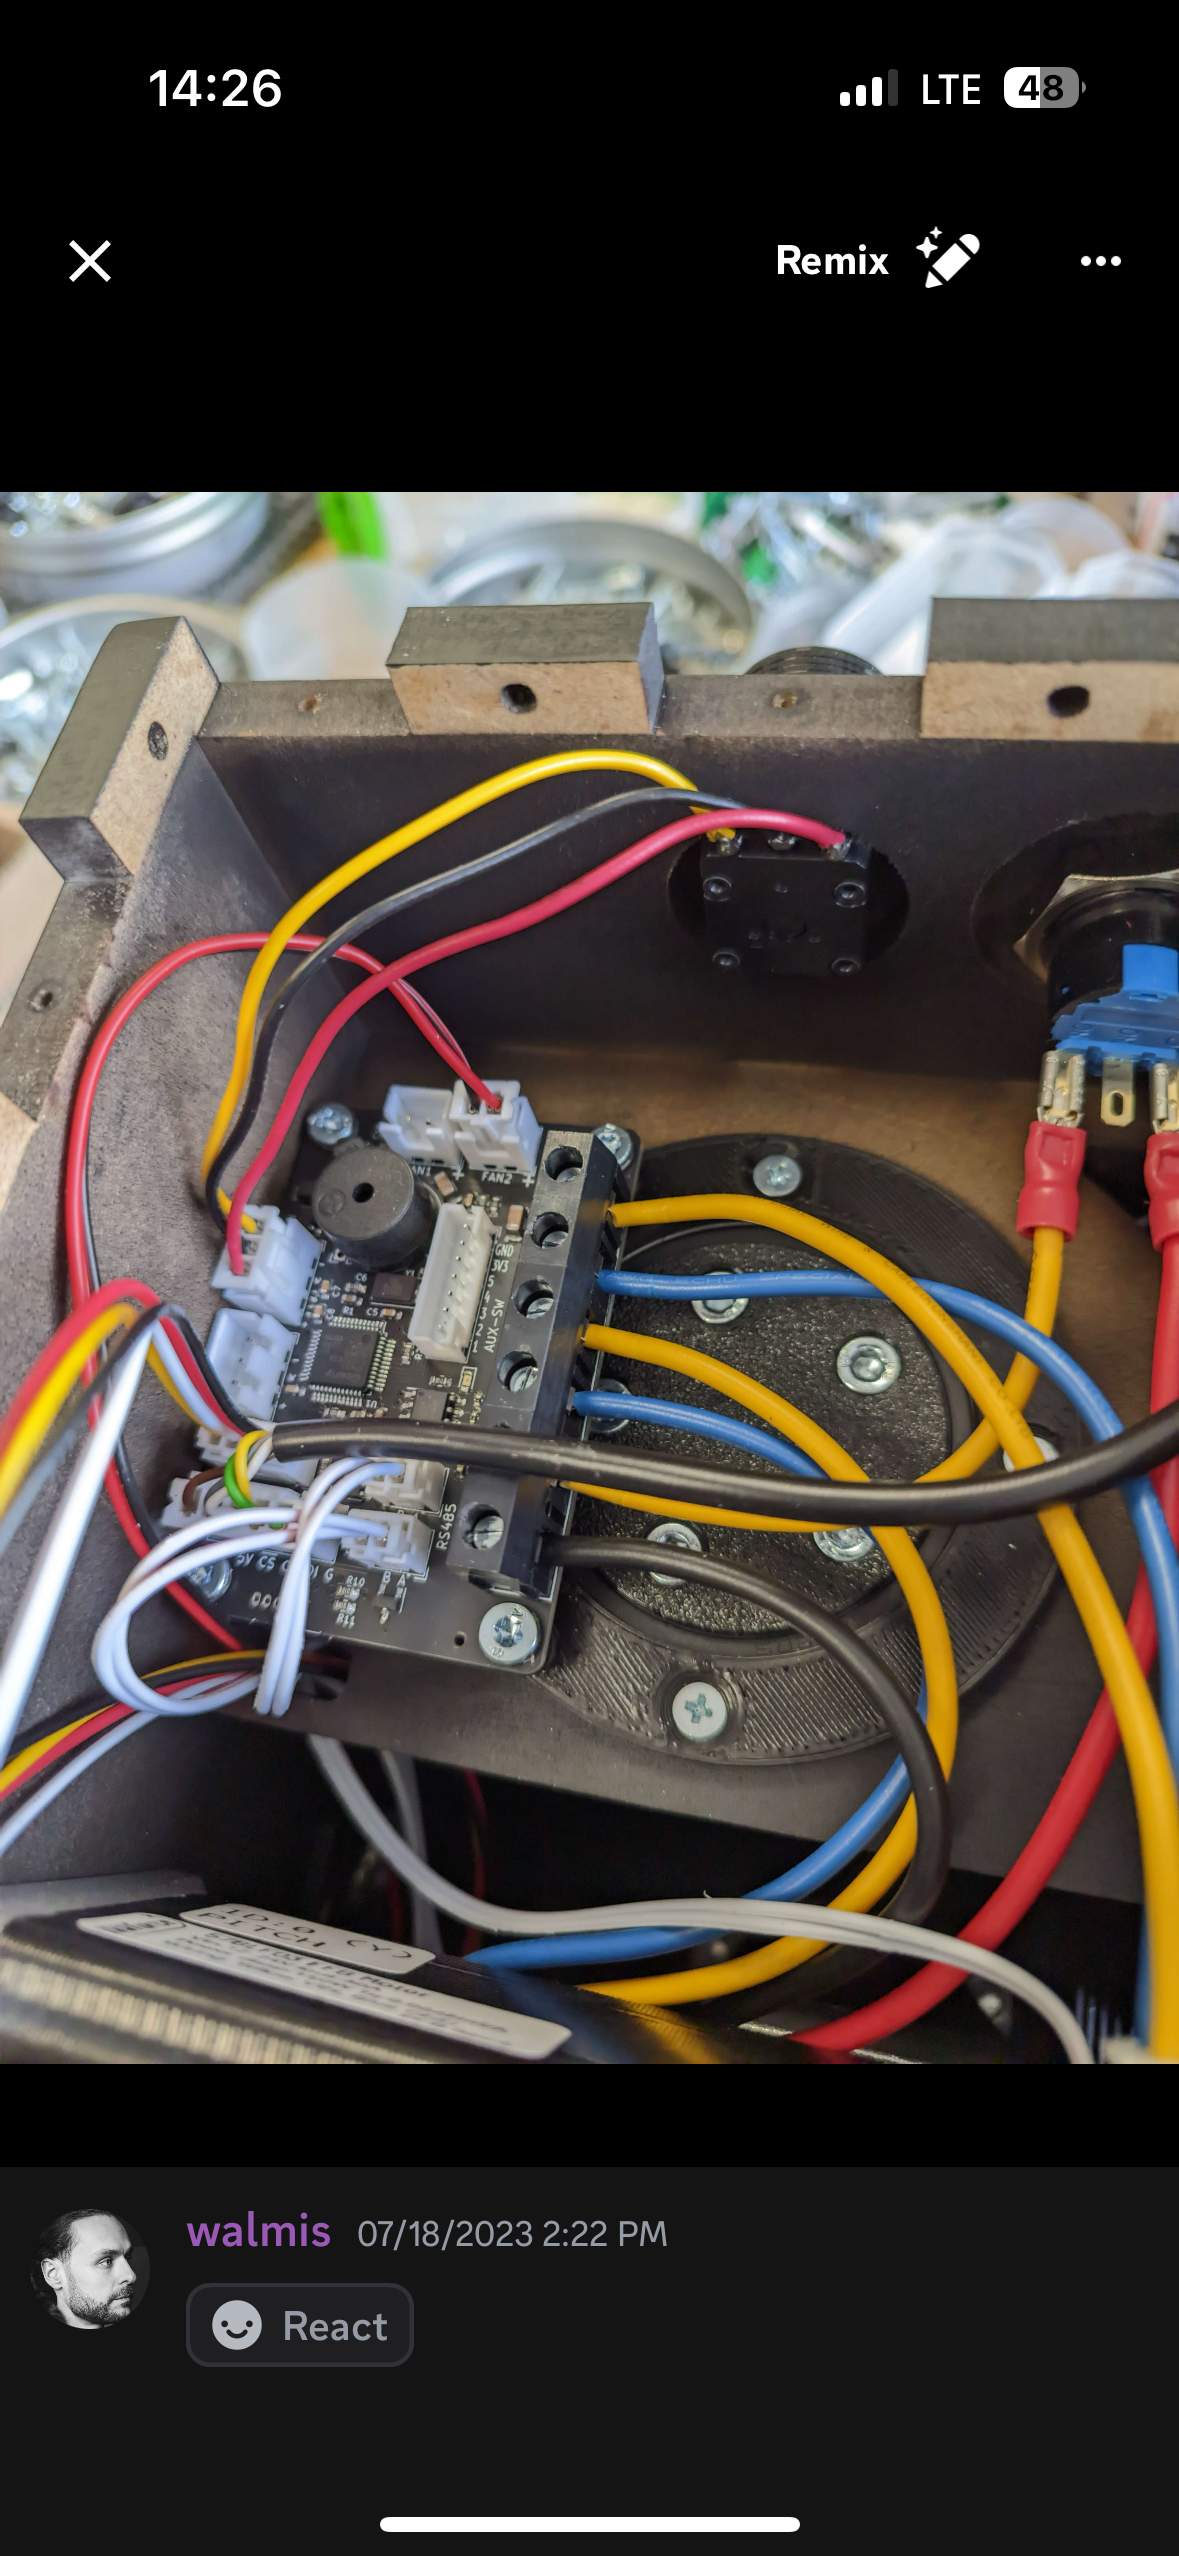
I have a pic I share that shows the inside wiring of a Rhino start switch (zoom in!)
The Power (+) comes from the plug to the C side of the Emergency cut off switch.
Power (+) goes from the NC side of the Emergency cut off switch to the Main board.
Negative (-) goes from the Plug to the Main board.
Outside that make sure to use lots of pics from the DIY section as alternate angles and I already know… You got this!
Happy building and Happy flying!
Depends on how confident you are with medium scale projects and/or the quality of prints also makes a slightly difference.
If you’re comfortable with a soldering station and have that preset up and you’ve got some random bits of wire or heat shrink you’ll be just fine.
Follow the guide.
Follow the guide.
Follow. The. Guide.
PAY CAREFUL ATTENTION TO PART ORIENTATION.
As example the main stick mount has a slot for the wires. Pay attention to “where it’s at” and “how it’s facing” in the pics and as you move along keep it as a reference point.
If you have ANY issue… back up and start again. Some parts can go on both ways but the screws only fit, or are only recessed, one way.
Remember wire length matters! Short and sweet plus a little slack..
When connecting the motors pay attention to the Labels. They should be facing UP!
I have a pic I share that shows the inside wiring of a Rhino start switch (zoom in!)
The Power (+) comes from the plug to the C side of the Emergency cut off switch.
Power (+) goes from the NC side of the Emergency cut off switch to the Main board.
Negative (-) goes from the Plug to the Main board.
Outside that make sure to use lots of pics from the DIY section as alternate angles and I already know… You got this!
Happy building and Happy flying!


![SR-F_Winger_[73]_David](https://cdn.discordapp.com/avatars/98037306870472704/f924b51d2e4486c1eb873c2f4fb7f6a3.webp?size=40)


![SR-F_Winger_[73]_David](https://cdn.discordapp.com/avatars/98037306870472704/f924b51d2e4486c1eb873c2f4fb7f6a3.webp?size=16)